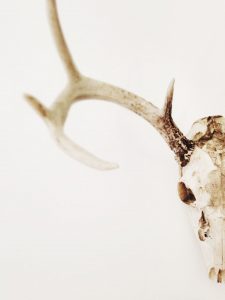
Bleached skulls are a great way to display the fruits of a successful hunt. If done right they offer you a way to show off and enjoy your collection on a daily basis.
One of the keys to whitening a skull is to use hydrogen peroxide instead of bleach like you may have suspected.
Bleaching skulls and bones is not difficult but it will require you to set aside some time to complete the task.
This isn’t something that you need a taxidermist for as long as you are willing to set aside some time to learn and put in the effort.
Much like adding a patina to a steel blade, there are many methods you can use when bleaching skulls but in this article I outline what I have found to be the easiest approach based on my experience.
How to Bleach a Skull with Peroxide

Here is a step by step guide you can follow when bleaching skulls. Whether you want to do a European mount of deer antlers or have a bear skull for your table, the method below will work.
Make sure to use hydrogen peroxide in the concentration specified below, do not use household bleach. Take your time and follow the instructions and you will be happy with the results.
1. Best Way to Clean a Deer Skull
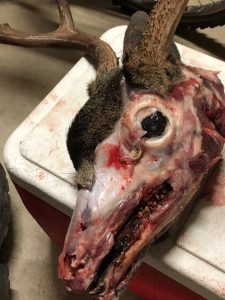
The first step you need to take before bleaching a skull is to get it nice and clean. This means removing all flesh, hair, muscle tissue etc. This includes the eyes, brain, and all the skin. The toughest part is usually on the skull around the antlers.
Use a sharp knife (I like the Victorinox Bird’s Beak) to cut away as much as you can. The more you can get off now, the easier the job will be later after boiling.
2. Soak and Boil the Skull
After you have removed as much tissue as you can manually, the next think to do is to soak the skull in warm water. There are a few ways you can do this but the best method I have tried is to boil the skull in a mixture of water and baking soda.
Find a pot large enough that your skull will fit in it. Mix water with baking soda in a ratio of around 1/4 cup baking soda for every gallon of water. The ratio doesn’t need to be perfect, just approximate.
Bring the water to a boil then reduce the heat until it is simmering. You do not want the water at boiling temperature when the skull is in it. Boiling water is too hot and may damage the skull.
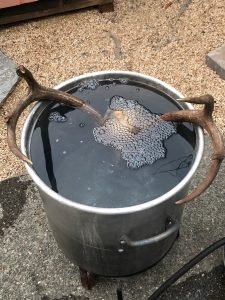
Place the skull in the simmering water and let it sit for 30-60 minutes with the heat keeping the water at a simmer temperature.
You should see the surface of the water develop a layer of grease as you soak the skull and the meat loosens.
3. Clean Again
After the skull has been in the warm water for 30-60 minutes remove the skull. Now it is time to manually remove as much tissue as you can again.
You want to get into every little crack and crevice possible. I find using an knife and a piece of old wire coat hanger to work the best.

At this point your skull should be looking very clean. If it still isn’t completely free of tissue, repeat the boiling procedure above again to get the last remaining bits. It is best to limit this to 2 cleanings in order to not damage the skull from the heat.
4. Let the Skull Dry
Now that your skull is nice and clean, you want to let the skull drain and dry. I usually like to wait a day or two for the water to evaporate. If you can, place it out in the sun to speed up the process.
5. Bleach the Skull
Finally, the step you have been waiting for.
Get yourself some 3%-6% hydrogen peroxide, you can get this at more local stores. You will need about 1 gallon to bleach a skull. You may need more depending on the size of the skull you are bleaching.
It is best to wear eye protection and gloves when handling any concentration of hydrogen peroxide.
Pour your peroxide in a plastic bowl or container large enough for the skull to fit in. Place the bowl somewhere you can safely leave it for about a day.
Submerse the skull in the peroxide mixture. Now all you have to do is wait until the skull whitened to the color you want. I find this usually takes about 24 hours.
6. Rinse with Water
Once you are done soaking the skull in hydrogen peroxide and are happy with the results, remove the skull are rinse it with water.
You want to make sure to rinse it nice and thoroughly so you wash away all the hydrogen peroxide. If you don’t, the peroxide will continue to act on the skull and potentially damage it over time.
After a good rinsing, set the skull somewhere to dry for another day or so.

7. Mount the Skull
You are now finished bleaching your skull. What you do at this point is up to you. You can now hang it on the mount of your choosing or place it somewhere to show it off.
Bleach Vs. Hydrogen Peroxide
You might be wondering if you can use household bleach on animal skulls. The answer is no, never use actual bleach on a skull
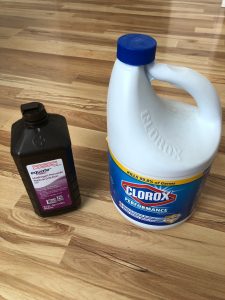
Household (chlorine) bleach will damage bones and break them down so much that they can become brittle and fall apart. It also will leave the skull yellow looking instead of the bright white we are looking for. Hydrogen peroxide actually breaks down the molecules that give the skull color as explained below.
Bone Bleaching 101
Hydrogen peroxide is an oxidizing agent that is commonly used to whiten things like teeth and clothing. It turns out that it works great for bleaching skulls as well.
How it works is based on chemistry. What happens is that the peroxide pulls electrons from other compounds that are holding atoms together, and in turn causes the “colored molecules” to fall apart.

This is why how white the bleached item becomes depends on how long the peroxide is allowed to sit and react with the molecules it is touching.
Frequently Asked Questions
How long does bleaching skulls take?
The prep work of removing muscle tissue and getting a skull completely clean will take the most active work. Once the skull is clean and placed in a ~6% peroxide solution it will take around 24 hours for whitening to leave you with a nice looking skull.
How much hydrogen peroxide do I need?
You will need about 1 gallon of 3-6% hydrogen peroxide to make a large enough batch for bleaching skulls. There is no harm in using more if you need a bigger container to fit your skull or bones.
What peroxide should I buy?
For bleaching skulls you will want 3%-6% hydrogen peroxide. This is the same stuff you can find at your local drug store.
There are some people who use higher concentrations to speed up the process but I don’t think it is worth the risk. The higher the concentration, the more dangerous.
Is peroxide dangerous?
In short, yes. Peroxide is extremely powerful. It can burn your skin, harm your eyes, and should not be ingested.
You should always wear gloves and eye protection when handling and be very careful not to get it on anything besides the skull you are bleaching.
What other methods can I try?
Another popular method to whiten bones is to use a hair bleaching compound. This compound is made from hydrogen peroxide as well. The mixture is usually thicken and applied with a paint brush to cover the skull.
I prefer the soaking method outlined above but know others that have had success with using hair bleach.

Another method that works if you are willing to wait long enough is to just leave the skull out in the sun. But forewarning, this could take quite a long time. You will also end up with something that isn’t quite as white and the skull will have a more damaged look due to the sun.
When doing the initial cleaning of the skull, another common approach is to use tissue eating bugs (beetles) to remove all the meat before bleaching. If you are interested in this route, try contacting a local taxidermist to see if they can put you in contact with someone who owns these “bug boxes”. One advantage of this technique is that it is less likely cause teeth to become loose in their sockets.
How do I dispose of peroxide?
Once you are bleaching skulls, you can dispose of your hydrogen peroxide by diluting it and pouring it down your sink drain or your toilet.
If you want to get some extra use out of it, you can leave it in your toilet bowl for a few hours before flushing it. This will help clean and whiten your toilet bowl.
Before pouring it in your toilet or down your drain, make sure to dilute it down to a concentration of no higher than 3%. Always make sure to wear eye protection and gloves when handling.
Can I use chlorine bleach?
No, never use any type of chlorine bleach like what is used for common household cleaning. Chlorine bleach will damage and dissolve bone tissue. Always use diluted hydrogen peroxide when bleaching skulls.