Have you ever wondered how you can setup an easy food plot for deer?
Well don’t worry, today’s article will take you step by step through creating a food plot that doesn’t take constant maintenance.
Many deer hunters like the idea of food plots on their property but aren’t sure where to start.
Food plots are one of the best ways to attract deer and ensure that they get the nutrients they need to grow to their full potential.
They can be the difference between a thriving hunting property and one that continually disappoints.
It might sound hard, but all it takes is a little bit of planning and following the simple steps below.
Let’s get started…
Easy Food Plots for Deer
So before getting into exactly how to make your plot, we need to figure out what you want to plant.
We want to select plants that are easy to plant, easy to maintain, and that deer love.
Ideally we want to pick plants that are perennials (meaning you don’t have to re-plant them every year).
This narrows it down to 3 good options.
Clover Plots
Our number one option is going to be a clover plot.
Clover plots are often referred to as a poor-mans food plot due to the fact that once they are planted they don’t require a lot of upkeep.
Clovers are perennials (unlike corn) and provide food year round in most geographical locations.

You can plant clover most times of the year.
They also don’t require nitrogen since they produce it themselves, meaning you won’t need to constantly fertilize your soil.
And deer love them…
They are an excellent source of protein and will help promote antler growth.
Just make sure you pick a variant that does well in your climate.
Brassica Blend
A Brassica Blend is another great choice for easy deer food plots.
Most blends contain a mixture of annual winter grasses and clover.

These are great for providing deer food starting around the rut and extending through winter.
They can be planted in early fall and be producing in time for winter.
Winter Wheat
Winter wheat is not as good of a choice as the two above but can still be useful when combined with clover as a supplement.

Wheat can be grown practically anywhere that deer can be found.
It is a great source of protein, is easy to plant, and handles the cold well.
When grown in the same plot as clover or brassicas, it can serve as a protective companion plant.
8 Easy Steps to Your First Deer Food Plot
The following steps give a good overview of the steps required to start your food plot.
They are based on planting something like the Imperial Clover shown below.
- Packed with ANTLER-BUILDING protein
- Helps does deliver HEAVIER, HEALTHIER fawns and produce more milk
- EXTREMELY cold tolerant as well as heat and drought resistant
The closer you follow them, the better your chances of being on your way to a thriving property.
1. Select and Prep Your Location
The first step is selecting where on your property to plant your food plot.
The best deer ranches recommend that about 5% of your property is covered with food plots to make sure there is enough feed for the deer year round.
Not everyone has the luxury of dedicating 5% of their property to food plots but it is a good reference to shoot for.
This can also mean multiple small food plots across your property.
Even more important is that you prep the area before continuing.
This means clearing brush and possibly even trees to allow sunlight to make its way through to the ground growth.
2. Test Your Soil
Once you have your area selected and prepared, the next step is to test your soil.
What you are really interested in here is the pH of the soil. According to Penn State University, we what to shoot for a pH between 6-7.
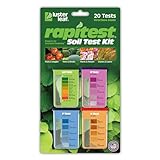
Testing the pH is easily done using a soil test kit like the one below.
- Quick, at home results for Soil pH, Nitrogen, Phosphrous and Potash
- Innovative and inexpensive soil test kit features an easy-to-use capsule system and patented color comparators
- Contains all components needed for 40 tests. 10 for each of pH, N, P and K
A soil sample is usually taken and mixed with a specified amount of water.
The soil test provides pH as well as other nutrient levels like nitrogen and phosphorus.
If your soil pH isn’t 7, don’t worry, we will get to improving the pH in the next step.
3. Control Weeds
Once you know the pH from your soil test, the next thing you need to do is to take that information and use it to get your soil in good shape.
Before modifying the pH, you will want to spray all the weeds in the area. It is best to do this multiple times (2-3) before continuing.
The better you control weeds early in the process, the less your seeds will have to fight for precious nutrients when they start to germinate.
4. Lime Your Soil
If your soil pH is too low, you will want to raise it by adding lime to the ground.
You can buy lime in powder or pellet form.
To spread the lime powder, you can move the bag around with a wheel barrow and spread it by tossing it by hand.
Lime pellets can be spread with a spreader like the one below. These can save you a lot of time if you have a lot of area to cover.
- Use the Scotts Turf Builder EdgeGuard DLX Broadcast Spreader to apply Scotts lawn care products
- Comes pre-calibrated and ready-to-use
- Scotts exclusive EdgeGuard Technology keeps lawn product off landscaping, driveways, and sidewalks
How much lime?
Good question. A 25 lbs. bag of lime covers about 5000 square feet of area.
You can use an online calculator to figure out how much lime you will need.
5. Fertilize
Now that you have addressed the soil pH, we want to fertilize the soil to provide food for the plants to thrive.
Fertilizer provides nitrogen, phosphorus and potassium
As far as which fertilizer to use, it is best to consult the label on the crop you plan to plant to select the one that is best.
For clover this means using a nitrogen free fertilizer.
Because clover produces it’s own nitrogen, any nitrogen fertilizer used on it will only promote weed and grass growth.
6. Til Your Soil
Now that you have fertilized your soil, you are going to want to til the soil to work the fertilizer in.
This can be done in a handful of ways but can be as simple as roughing up the ground with a rake.
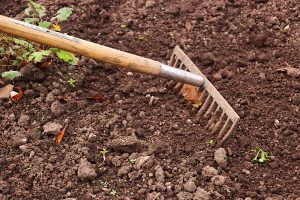
Obviously, if you have a lot of ground to cover, a rake might not be the most efficient way to til the soil but it will get the job done.
By breaking up the ground, you will also help to promote seed germination once you have laid your seed.
7. Seed Your Soil
Finally, the moment you have been waiting for.
All the previous steps have be preparation for this moment.
But there are still a few tips you can use while seeding.
Before laying any seed, spend a little time to firm up the tilled soil. We don’t want the seeds to go too deep in the soil otherwise it will be harder for them to make their way to the surface.
Once you have firmed up the soil, it is time to spend the seed. You can do this by hand or with a seed spreader.
A good rule of thumb is to spread about 7 lbs. of seed per acre.
After you have spread the seed, you want to re-drag the soil. You can do this with the flat end of a rake or by towing a drag behind a tractor or ATV.
If there is rain forecasted in the next few days, you can skip the dragging step and let the rain work the seeds in.
8. Maintain Your Deer Food Plots
Once your food plot is up and growing, you will want to periodically spend time to maintain it.
A little bit of work here can go a long way.
A few things to make sure you stay on top of are:
- Spray liquid fertilizer once you start to see some growth and continue for another month or so during the growing season.
- Maintain established food plots by fertilizing 1-2 times per year when the plants are dry.
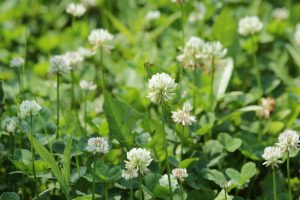
- Once the clover starts to flower, mow the plot if possible.
- Do not mow annual crops.
- Keep weeds and grass under control. Grass killer can help a lot.
If you have made it this far, you can expect more deer on your property come deer season.
Deer Food Plot Challenges
Now that you know the steps required to plant a food plot, we are going to cover some common hangups hunters run into when they are new to food plots.
Your Food Plot isn’t Growing Well
There are a few common causes of a plot that isn’t growing as well as planned. Here are a few and what you can do about it.
Not Enough Sun
Food plots need sun to flourish. If the food plot is covered by trees, branches, or brush, it is not going to flourish. The easiest way to remedy this is to make sure the area has been well cleared prior to planting the plot.

You Didn’t Test Your Soil
This is a common mistake that leads to poor performing plots because the soil is not well suited for plant growth. Soil test kits are relatively inexpensive, take the time before you start to save yourself the headache later.
You Over-Seeded
Each seed needs a certain amount of space and nutrients to grow. If seeds are spread too dense, they will be fighting with each other to get adequate nutrition. Try to stick to the manufactures recommendation for how much seed to use per area.
Frequently Asked Questions About Deer Food Plots
What is the best year round food plot?
Clover is the best choice for a year round food plot. It is a perennial that will provide food year round unlike an annual like corn.

How often should I fertilize a hunting plot?
For clover food plots, you should fertilize 1-2 times per year with a nitrogen free fertilizer. Consult your see label for exact recommendations.
Be sure to fertilize when the plants are dry.
Conclusion
I hope you found this article helpful.
Now you can stop feeding deer bread and make them a nice easy food plot.
Stick with a clover plot to start and build from there.
As long as you follow the steps outlined in this article, your food plots will flourish and the deer on your property will have adequate year round feed.
Come deer season, you will be glad you put in the extra effort and hopefully be rewarded with some big bucks.

